
Last Updated on: Sep 11, 2023
Solar panels are becoming a popular addition to homes and businesses worldwide, as they offer a renewable energy source that can reduce bills while also protecting the environment. Installing them can be an intimidating undertaking, but it can be done as a DIY project.
What We'll Cover
If you're looking to install solar panels without hiring outside help, check out this easy DIY guide to see what the process entails.
Spend Time on Preparation
The preparation stage will be crucial to a DIY installation of solar panels. During this stage, you should focus on three main parts:
The Plan
Before you embark on your DIY solar panel installation journey, you should make a comprehensive plan that touches on what you need to do and what you need to decide before getting to work. Some of the things you should consider at this stage are included below.
Focus on the Aims
The first step you should take is figuring out what you're aiming for with your intended solar panel system. This will inform your decision regarding the type of installation that is best suited to your household and will ultimately give you a product that focuses on catering to your goals.
Understanding what you're looking to achieve most from your solar panel system will also affect the costs and the size of the installation, which you should consider. You may want a solar panel system to save money, help reduce emissions, have independence from the grid system, or always have backup power when you need it.
Suppose you're looking to achieve more of these goals simultaneously. In that case, you will be looking at a complex installation that will require more time and finances, so this step is essential to ensure a smooth process without any surprises.
Research Regulations
Before you sit down to get all the paperwork you will need in this process, you should find out precisely what you will need. This step will determine if you are allowed to do a DIY installation of solar panels in your state or local jurisdiction. This can vary significantly based on location and should be one of the first things you research.
During this stage, you should find out exactly what permits and certificates you will need when the installation happens. This means you'll be prepared for any inspections or further steps before they become necessary.
Explore Available Systems
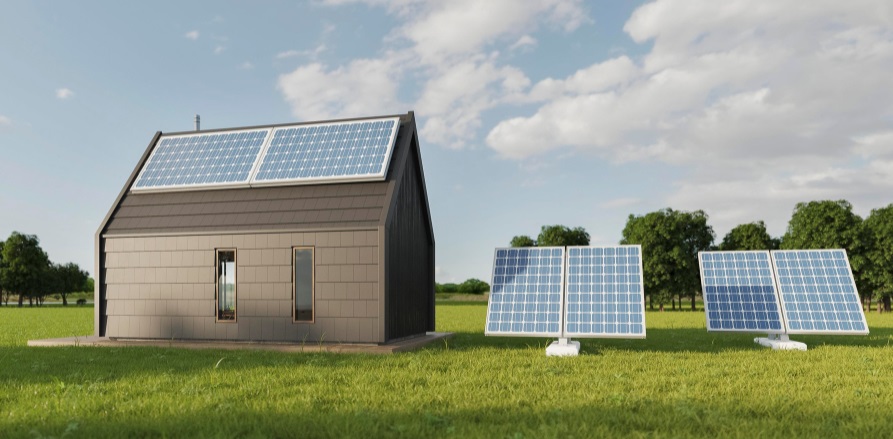
There are numerous solar panel systems, and the decisions you make in the first step of this planning stage will determine which one you should pursue. These are the three types of systems that you are most likely to encounter when you explore your choices:
- Off-grid: This setup is wholly independent of the electric grid, and requires a vaster installation process that can accommodate a large battery bank and enough solar panels to power a household every day of the year. This is the most expensive choice.
- Grid-tied: This is usually the cheapest upfront option, and through it, the grid is used as a battery. Grid-tied systems don't offer backup power, but they can be very convenient when first investing in solar panel systems.
- Hybrid: This setup combines a grid connection with battery storage. Its price point is also usually found in between the other options, as it offers more than the grid-tied version by including backup power.
Design
This step will consume most of your time during the planning stage, as you will need to design the best system for your needs. You will have to consider the following aspects:
- Climate
- Energy usage
- Panel angle
- Panel orientation
- Shading
- Natural efficiency drop
- Battery storage size (if applicable)
- Expansibility
These factors will affect the look, functionality, and price of your system. You should also create an electrical diagram at this time, as it provides an excellent blueprint moving forward. You will need one when you apply for permits, but it will be helpful to you beyond that.
Calculate
Once you've gone through the other steps in this planning stage, you'll be able to have enough information to bring in the math. This will help you understand your cost estimates as you move toward the installation, and it will also consider the savings you will be looking at getting in the long run.
To discover an estimate for the system, research DIY setups similar to what you are considering. This will help you see an approximation of the price you will be spending on purchasing the system. Make sure to select a size that is as close to your design as possible to keep the estimate in the same ballpark.
If you're looking to get an estimate for the potential savings you will be getting through this system, you will first need to know the annual output that your system will have. This will vary based on your location, and you can check the number here. The annual output should then be multiplied by the local price for electricity to give you an estimate of savings.
Once you've established these figures, you can find out the return on your solar panel setup in several ways. One of them involves subtracting the cost of the setup from the electricity bill savings. This should offer you insight into what you will be saving in total, as well as the potential long-term benefit of this investment.
The Paperwork
As mentioned in the planning stage, it is crucial to make sure that your solar setup is fully code-compliant in your location. The legality of your DIY solar panel system is essential to its success and will prevent any setbacks or delays during your installation.
Before you proceed with the installation, make a list of the permits and certificates that will be required in your state, as well as by the utility and the authorities in the local area. You will most likely need basic permits for building work, as well as for installing utilities.
The process to get these will usually require inspections by electricians or structural engineers before the installation can proceed.
The Buying Stage
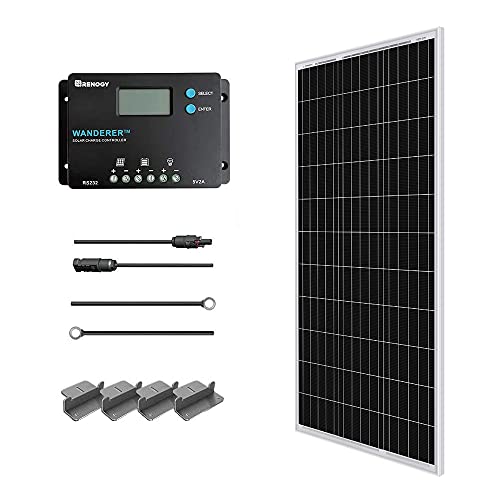
Includes 100W Solar Panel + 30A PWM Negative ground Charge Controller + Solar Panel Connectors +8Ft 10AWG Tray Cable+ Mounting Z Brackets for RV, Boat
Monocrystalline solar cell efficiency: 21%;The...
Once you have sorted out the paperwork and the permits are being processed, you can get to the final stage before the installation: purchasing the equipment. Before that, it's recommended to find a supplier for solar panel cells. Affordability is a good factor, but in this case, you should prioritize suppliers offering long-term warranties and ongoing technical support.
After securing a supplier, you should consider the equipment you'll need too. The most straightforward way is to purchase a complete solar panel kit made specifically for the DIY process. You should do some research to establish the reviews and reputation behind the kits, but it will save you plenty of effort in the long run.
If you'd rather secure the parts individually, you need to be fully aware of the components you'll need and whether they'll be compatible. These are some of the essential parts you'll require for the installation:
- Mounting equipment
- Racking equipment
- Solar inverter
- Solar panels
- Wiring
- Electrical supplies
- Battery system (if applicable)
- Charge controller (if applicable)
Once you have your equipment and approval of your permits, you can proceed to your DIY solar panel installation, which will vary depending on the type you have decided to get.
Go Through Pre-Installation Checks
The planning stage will have indicated to you how the installation process will go, but before you jump into it, do some final checks to ensure that you are ready for the challenge.
Ensure All Equipment is Ready
On top of the elements listed above, other items you will need include junction boxes and splices, AC breakers and subpanels, AC disconnects and fuses, PV meters for grid-tied systems, conduits and meters, and a good drill that is suitable for the process.
Safety is Key
Installing a solar panel system will involve working with electricity, and it will also be physically demanding. In most situations, you'll also have the added risk of doing this installation on your roof. Protective equipment is essential: you should have eye and hand protection, and always wear the proper shoes. Do not use metal accessories.
Long sleeves and a harness are ideal for roof work, and you should also ideally have roof anchors, boots with flat soles and a good grip on tiles, and building aids like scaffolding or a lift. Do not work on the roof when the weather conditions make it even more dangerous.
If you are installing your system on the ground, basic safety should still be in effect, especially if there is dig work involved. Make sure to avoid accidentally digging into gas or electrical lines. If mixing concrete, wear a respirator mask, gloves, eye protection, and long sleeves.
Lastly, do not use any equipment unless you are trained to do so. You should also be aware of the correct techniques for heavy lifting to avoid injuries.
Manage the Wiring
The wiring will change according to the system you will be using, but some tips for managing this part of the process will remain similar. You should plan out your wiring run before proceeding with doing it to make sure you have a clear route that won't interfere with other elements.
You should also use wire clips when running the wiring along the frame and rails of the solar panels. This will ensure that the leads won't move with the wind and touch the roof, which would become a safety hazard.
You may encounter the use of spring clamps when installing solar panel systems. These will involve opening the clamp, placing the wire, and then releasing the spring to secure the wire and keep it seated in that position.
Connect the Electricity
Connecting the electricity will depend on your wiring run, which will depend on your system type. Here are the usual types of connection:
Grid-Tie with SMA Inverter or Centralized SolarEdge
In this type, the solar panels are connected to the junction box, which is then connected to the inverter. The AC out is then connected to the main or subpanel.
Grid-Tie with Enphase Micro-Inverters
The use of micro-inverters alters the grid-tie wiring process by using slightly different connections. The solar panels will be connected directly to the micro-inverter, which is then hooked to the trunk cables. These are then connected to the junction box, which leads the way to the main panel.
Off-Grid
For off-grid systems, you'll start by connecting the solar panel strings to the combiner box, which will then be attached to the charge controller. The charge controller leads to the battery bank, which feeds into the inverter. The inverter leads to the main panel.
With this system, the generator will also feed back into the inverter on a separate path from the run leading to the solar panels.
Mount the Inverter
There are some differences between inverters used for different solar panel systems. Grid-tie systems can have inverters mounted on walls, on the back of ground substructures, or outdoors. Off-grid inverters have to be mounted on walls indoors, or they won't meet the legal safety requirements.
Tips for Wall-Mounted Inverters
These inverters are necessary for off-grid systems but are also used for grid-tied systems. You should keep some of these tips in mind during the installation process:
- Make sure there is enough clearance that will allow the inverter acceptable conditions to cool.
- The National Electric Code states that the type of inverters with disconnect switches must be less than 6.5 feet off the ground.
- Avoid direct sunlight.
- Keep ignition sources off the ground if you're mounting the inverter in a garage or other enclosed space.
Tips for Inverters Using the Ground Substructure
The ground mount substructure can only be used for grid-tie systems and requires other considerations to be considered:
- Make use of a thread locker to secure the inverter to the support.
- Do not leave the inverter exposed to the direct glare of the elements.
- The inverter should be mounted at least 36 inches off the ground. This will avoid damage from heavy rains.
Ground the System
This is an essential part of the process that will ensure the safety and preservation of the system. You should always bond the metal parts of the system to the ground, and the conductive materials to each other. This will give every piece in the system the same ground reference.
Some of the terms you'll encounter at this stage of the process may be unfamiliar to you. We'll cover some of these below so that you can adequately prepare for this part.
Integrated Grounding
Some fasteners will allow a solar system to be grounded with one grounding lug. For other types of mounts that do not integrate grounding, you will have to personally ground each element with adequate fasteners.
GEC and EGC Grounding
GEC stands for Grounding Electrode Conductor. It connects the ground rod to the electrical system, usually through only one grounding point that meets the ground. EGC stands for Equipment Grounding Conductor and usually takes the shape of a green or copper wire usually used to ground conductive materials together.
Other Elements
If you opt for a system that includes ground fault protection, you will encounter the DC negative to ground bond. You may also find neutral to ground bonds in generators and distribution panels. You should only have one of these per system.
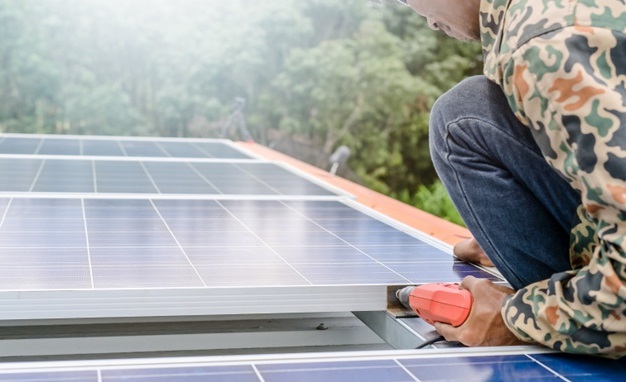
Mount the Panels
Once you have sorted out the wiring and the electrical parts, your next step will involve mounting the solar panels. These will usually either be installed on a roof or in the ground, and the following steps will help guide you through the processes involved in both these categories.
Roof Mounting
If you decide to mount your solar panels on a roof, five steps are usually involved in this process.
Marking Roof Rafters
You should find out the location of your roof rafters to be able to bolt the flashings to them. This is the best way to ensure a stable mount. If you're not already aware of the rafters' location, you can either find them by sight, sound, or drilling small holes in your roof to discover them.
Once you have found the rafters, you should use chalk to draw lines between the two endpoints of each rafter. This is a non-permanent signal of where the flashings should line up when you are mounting the system.
Installing Roof Attachments
Once you have created chalk lines to mark your rafters, you can install the roof attachments. These will be used for the mounting rails, and will significantly differ depending on the type of roof you have. You should plan to stagger the location of the flashings so that they cover as wide an area as possible while still aligning with the holes on the panels.
For shingle roofs, you will usually find flashing systems specifically made for them, and that will come with clear instructions from the manufacturer. For metal roofs, you will require specific types of roof clamps that vary depending on the particularities of the roof.
You can also use tile hooks, or even a tile replacing system. If you have a roof that slopes or that is flat, you can opt for ballasted mounts.
Installing Racking Rails
Once you have finished attaching the flashings to the roof, you can add the racking rails on top of them. These should be cut to measure before you climb on the roof, and you should always follow the manufacturer's instructions.
Bringing the Panels to the Roof
This is one of the riskier parts of the installation, as you will have to take great care in bringing the solar panels where you will place them on top of the racking rails. It's recommended to use plenty of protective gear. You should also make use of scaffolding if you can. If there is none available, you should strongly consider a lift.
There are many types of lifts made for building work and that you can procure to bring the panels up to the roof level. You can opt for a boom lift, a ladder lift, or a scissor lift. This will take some of the risks away and provide considerable help while keeping you away from the heavy lifting.
Mounting on the Rails
When the solar panels have made it to the roof, they can be installed on top of the racking. This part will also vary depending on the system and the parts used. Still, you will essentially align the holes in the panels with the rails and then proceed to secure each panel individually until it is correctly mounted.
Ground Mounting
This type of mounting involves fewer steps but may entail a bit more work, depending on your circumstances. Three elements are of importance here, and they are very similar to the key elements in roof mounting, with slight variations.
Create a Foundation
This step will usually be the most time-consuming, as you will have to build a foundation with structural integrity. This will involve digging holes for anchoring, placing piers, and pouring concrete. You should only pour the concrete once every other element is in its precise space.
Exercise great care when mixing or placing concrete, as it can cause a lot of damage. Set the piers up according to the exact engineering specifications you will be provided within your kit. You will have to create a structure to hold the piped concrete where it is while it hardens, a process that can take up to 21 days to fully complete.
At least a week should pass between the placement of the piers and the building of the rest of the system, to make sure that the concrete has had enough time to properly set.
Install the Rails
Once the concrete foundation has been set, you can proceed to the installation of the rails, which will be made specifically for the system you will be using. When placing the rails, make sure to follow the manufacturer's instructions, as they will contain the exact spacing you should follow and how to match it perfectly with the panels.
Bear in mind that some panels have an overhang, so account for that and any other clearance space you might need when placing the rails.
Mount the Panels
After the rails are placed, you can bring in the panels. This part will involve less work than the roof mounting process and will otherwise essentially be the same. You will fit each of the panels to the rails with fasteners such as clamps, and then use stopper sleeves for the last panels in a row.
Once the solar panels are correctly secured to the rails on top of their concrete foundation, they will be ready to go.
Install the Battery

VERSATILE OUTLETS CHARGE UP TO 7 DEVICES AT THE SAME TIME: Pushing 300 Rated and 600 Peak Watts Through (2) 120V Household Outlets, (1) USB Port, (1) Quick Charge USB Port, (1) USB-C Port, (1) 6mm ...
For off-grid and hybrid solar panel systems, you will need to go through an additional installation step: hooking up the battery bank. There are three types of batteries that you will usually find for solar panel battery banks:
- Lithium-ion batteries: Known as "deep cycle" batteries, this type will provide more energy on less charge.
- Sealed lead-acid batteries: These are very affordable batteries that have been tested in solar panel systems for decades, but they have a shorter lifespan. A great choice for off-grid systems or those that require large numbers of panels.
- Flooded lead-acid batteries: These are the least expensive option, but not necessarily the most cost-effective. They are straightforward to find and also a good solution for larger systems that require plenty of power. Make sure to keep them away from exposure to the elements and check their water levels.
Battery Safety
Installing batteries comes with added risks, and you should take all the precautions when dealing with them. It is essential to avoid short-circuiting, so make sure to use insulated tools and pay attention to their negative and positive terminals. Use protective gear and check conductors frequently, and avoid damage to the wires.
Lead-acid batteries require the extra protection of acid protective gear and items like baking soda and eyewashes nearby in case of spills, as the batteries are highly corrosive.
Further Battery Tips
To ensure the maximum lifespan for your batteries, try to keep the battery bank in a location that will remain under 77F and over 32F the whole time. You should perform regular maintenance checks, especially on lead-acid batteries, which are more volatile. The installation of the battery bank will be determined by the system you use.
You should keep batteries well-ventilated and away from any potential electrical discharge. You should also keep them away from adhesive materials or solvents. If you use more than one battery, you should place them at least an inch apart so that they have enough space to cool when necessary.
You should never attempt to open the inside of a battery or otherwise tinker with it, especially if it's an acid-lead one that can leak under duress.
Conclusion
Solar panels are a great way to save on your electricity bill while helping the environment. A DIY installation process may seem like a challenge but, as long as you do your research, get the proper permits, and bear in mind the details involved in what you're doing, it will be a straightforward process. Make sure to take as long as you need to understand the process before you pursue it.
The responses below are not provided, commissioned, reviewed, approved, or otherwise endorsed by any financial entity or advertiser. It is not the advertiser’s responsibility to ensure all posts and/or questions are answered.